Turn on suggestions
Auto-suggest helps you quickly narrow down your search results by suggesting possible matches as you type.
Showing results for
Data Engineering
Join discussions on data engineering best practices, architectures, and optimization strategies within the Databricks Community. Exchange insights and solutions with fellow data engineers.
Turn on suggestions
Auto-suggest helps you quickly narrow down your search results by suggesting possible matches as you type.
Showing results for
- Databricks Community
- Data Engineering
- Delta Live Tables + S3 | 5 tips for cloud storage ...
Options
- Subscribe to RSS Feed
- Mark Topic as New
- Mark Topic as Read
- Float this Topic for Current User
- Bookmark
- Subscribe
- Mute
- Printer Friendly Page
Delta Live Tables + S3 | 5 tips for cloud storage with DLT
Options
- Mark as New
- Bookmark
- Subscribe
- Mute
- Subscribe to RSS Feed
- Permalink
- Report Inappropriate Content
08-16-2022 01:29 AM
You’ve gotten familiar with Delta Live Tables (DLT) via the quickstart and getting started guide. Now it’s time to tackle creating a DLT data pipeline for your cloud storage–with one line of code. Here’s how it’ll look when you're starting:
CREATE OR REFRESH STREAMING LIVE TABLE <table_name>
AS SELECT * FROM cloud_files('<cloud storage location>',  '<format>')
The cloud storage locations could be AWS S3 (s3://), Azure Data Lake Storage Gen2 (ADLS Gen2, abfss://), GCP Cloud Storage (GCS, gs://), Azure Blob Storage (wasbs://), ADLS Gen1 (adl://). Databricks File System (DBFS, dbfs:/) is also an option, but it’s not recommended for production pipelines.
Check out these 5 tips to get DLT to run that one line of code.
1. Use Auto Loader to ingest files to DLT
2. Let DLT run your pipeline notebook
3. Use JSON cluster configurations to access your storage location
4. Specify a Target database for your table(s)
5. Use the ‘Full refresh all’ to pull DLT pipeline code and settings changes
Tip #1: Use Auto Loader to ingest files to DLT
Knowledge check: What is Auto Loader?
Auto Loader provides a Structured Streaming source called cloud_files. Given an input directory path on the cloud file storage, the cloud_files source automatically processes new files as they arrive, with the option of also processing existing files in that directory. Auto Loader can ingest JSON, CSV, PARQUET, AVRO, ORC, TEXT and BINARYFILE file formats. Auto Loader has support for both Python and SQL in Delta Live Tables.
Example: Auto Loader with S3
CREATE OR REFRESH STREAMING LIVE TABLE my_S3_data
AS SELECT * FROM cloud_files('s3a://your_datbase_name', 'json')
Your next steps
- Go to your Databricks landing page and select Create Blank Notebook.
- In the Create Notebook dialogue, give your notebook a name and select SQL from the Default Language dropdown menu. Pop in your version of that one-line of code. You can leave Cluster set to the default value. The Delta Live Tables runtime creates a cluster before it runs your pipeline.
- Once you’ve written your pipeline code in a notebook, don’t run that notebook. Instead, go create your first DLT pipeline (see Tip #2).
More resources
- Using Auto Loader in Delta Live Tables [AWS] [Azure][GCP]
- Auto Loader [AWS] [Azure][GCP]
- Ingest data into Delta Live Tables [AWS] [Azure][GCP]
- Auto Loader provides a number of options for configuring cloud infrastructure: [AWS][Azure][GCP]
Tip #2: Let DLT run your pipeline notebook
Knowledge check: What is DLT?
Delta Live Tables is a framework for building reliable, maintainable, and testable data processing pipelines. You define the transformations to perform on your data, and Delta Live Tables manages task orchestration, cluster management, monitoring, data quality, and error handling. Read more in the Delta Live Tables introduction [AWS] [Azure][GCP].
Example
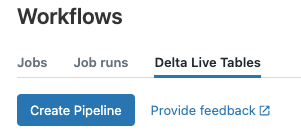
- You must start your pipeline from the Delta Live Tables tab of the Workflows user interface. Clicking the triangle run icon in your notebook to run your pipeline will return this error: “This Delta Live Tables query is syntactically valid, but you must create a pipeline in order to define and populate your table.”
Your next step
- Open Workflows from the left navigation menu

- Select Delta LiveTables

- Create your pipeline and select the notebook you just created with one line of code
- Setup access to your storage location using instance profiles (recommended for production) or keys and secrets (see Tip #3).
- Start your pipeline in DLT. Remember, you won’t need to run the notebook, DLT will.
More resources
- Delta Live Tables quickstart [AWS] [Azure][GCP]
- Getting Started with Delta Live Tables
Labels:
- Labels:
-
Adls-gen2
-
Autoloader
-
Delta Live Tables
-
DLT


2 REPLIES 2
Options
- Mark as New
- Bookmark
- Subscribe
- Mute
- Subscribe to RSS Feed
- Permalink
- Report Inappropriate Content
08-16-2022 01:36 AM
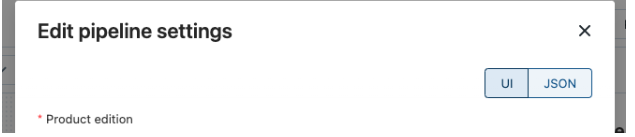
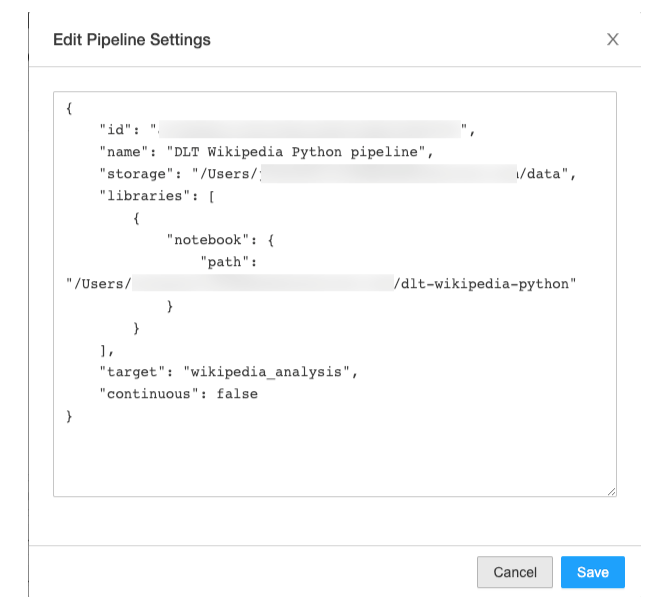
Tip #3: Use JSON cluster configurations to access your storage location
Knowledge check: How do I modify DLT settings using JSON?
Delta Live Tables settings are expressed as JSON and can be modified in the Delta Live Tables UI [AWS] [Azure][GCP].
Example: Add an S3 instance profile to the DLT Cluster Config via JSON
 "clusters": [
        {
            "label": "default",
            "aws_attributes": {
                "instance_profile_arn": "arn:aws:..."
            },
            "autoscale": {
                "min_workers": 1,
                "max_workers": 5
            }
        }
    ]
Your next step
- Open the Settings for your pipeline and switch from UI to JSON.

- Add your cloud storage location configuration in the “clusters”:[] section using the example above.
- If your pipeline runs on different clusters for different modes, e.g., default and maintenance clusters, be sure to add the cloud storage location details to each.
More resources
- Delta Live Tables settings [AWS] [Azure][GCP]
- Secure access to S3 buckets using instance profiles | Databricks on AWS
- If you don’t use instance profiles, you can use the following options in your pipeline notebook with Auto Loader to provide credentials to access AWS SNS and SQS when IAM roles are unavailable or when you’re ingesting data from different clouds.
- Accessing Azure Data Lake Storage Gen2 and Blob Storage with Azure Databricks - Azure Databricks | M...
- Google Cloud Storage
- With cloud storage location access details set in the JSON or the notebook used by DLT, do a ‘Full refresh all’ (see Tip #5).
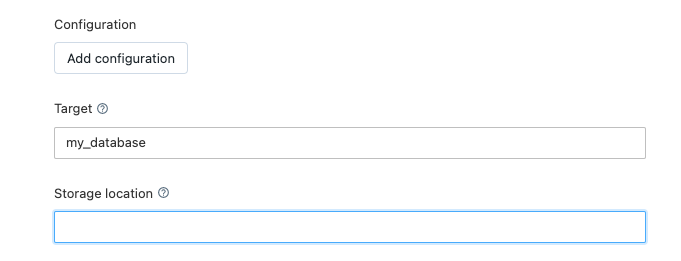
Tip #4: Specify your Target database for your table(s)
Knowledge check: Why set a Target?
Add the Target setting to configure a database name for your tables. Setting a Target makes using your new table(s) easier after you start the pipeline. If you don’t set a Target on pipeline creation in the UI, you can go back and set a Target in the JSON.
Examples
UI to set the target for a new pipeline


- Set a Target
- Start the Pipeline
- Create a new notebook (not your pipeline notebook) to explore the database and table(s) using your preferred language, i.e., SQL would be:
select * from my_database.table_nameMore resources
Tip #5: ‘Full refresh all’ pulls pipeline code and settings changes
Knowledge check: What are Pipeline Updates?
After you create the pipeline and are ready to run it, you start an update. An update does the following:
- Starts a cluster with the correct configuration (See Tip #3).
- Discovers all the tables and views defined, and checks for any analysis errors such as invalid column names, missing dependencies, and syntax error (See Tip #1).
- Creates or updates tables and views with the most recent data available.
Example

So, how’s your DLT + cloud storage running? Drop your questions and tips in the thread! 🧵
Options
- Mark as New
- Bookmark
- Subscribe
- Mute
- Subscribe to RSS Feed
- Permalink
- Report Inappropriate Content
10-13-2024 05:43 AM
Hi MadelynM,
How should we handle Source File Archival and Data Retention with DLT?
Source File Archival: Once the data from source file is loaded with DLT Auto Loader, we want to move the source file from source folder to archival folder. How can we do that?
Data Retention: Based on some requirement, only keep data for 90 days in Lakehouse populated with DLT. How could we achieve it with DLT?
Thank you!
Announcements


Related Content
- How to Prepare Enterprise Data for AI Agents: A Practical Guide in Data Engineering
- Getting 'Unauthorized Access' when Serverless compute is trying to read s3 bucket data in Data Engineering
- Row and column level security on unity catalog in different approaches in Data Governance
- Lakeflow SDP (DLT) produce external tables, or only UC-managed in Data Engineering
- Compute Policy for DLT pipeline error in Data Engineering